How to Build and Stretch a Canvas
One of the most valuable skills that I learned at TCU was how to build and stretch my own canvases. It was one of those tasks that seemed a bit burdensome at first, and I could tell many stories of my epic building failures. While I am still refining and streamlining the building process, I would consider the ability to build my own canvases one of the most impactful attributes of my artistic practice not only for the quality, but for the customization of sizes, which is great for commission work!
The first time I painted on canvas that I’d built myself immediately put all other store-bought canvases to shame. The texture is unmatched. Store-bought canvases have a rougher texture that can appear plastic-y on the finished painting, but the ones I build have the right balance of texture and smoothness, and have a beautiful matte quality. Another quirky factor that I love about hand built canvases is the bouncy-ness of the canvas. I can control how tightly I stretch the canvas, and the slight bounce in the surface contributes to the movement of the scene that I eventually paint. Store-bought canvases are much stiffer and have much less give, so that is one more quality that makes hand built canvases invaluable.
The process begins with the raw materials. I use poplar wood as the frame of the canvas. Poplar is a stronger wood than pine, but flexible enough to keep the canvas lightweight and forgiving. I source my canvas from a store in Fort Worth called American Canvas. While their forte is in materials for large tents and sails, they keep a roll of raw duck canvas just for artists.
I was lucky enough to marry a man whose family is well stocked on all of the power tools that I need for this process, and even has an entire building dedicated to construction projects. Clearly Austin and I were meant to be, because he and his family met my most specific need for access to power tools and a space to use them. Fate is funny that way.
Alright, let’s get to building!
FIRST: Determine size of canvas and buy enough wood for the outside frame, the support bars and corner pieces. I typically add one support bar in between the two longest sides, and usually have four corner pieces.
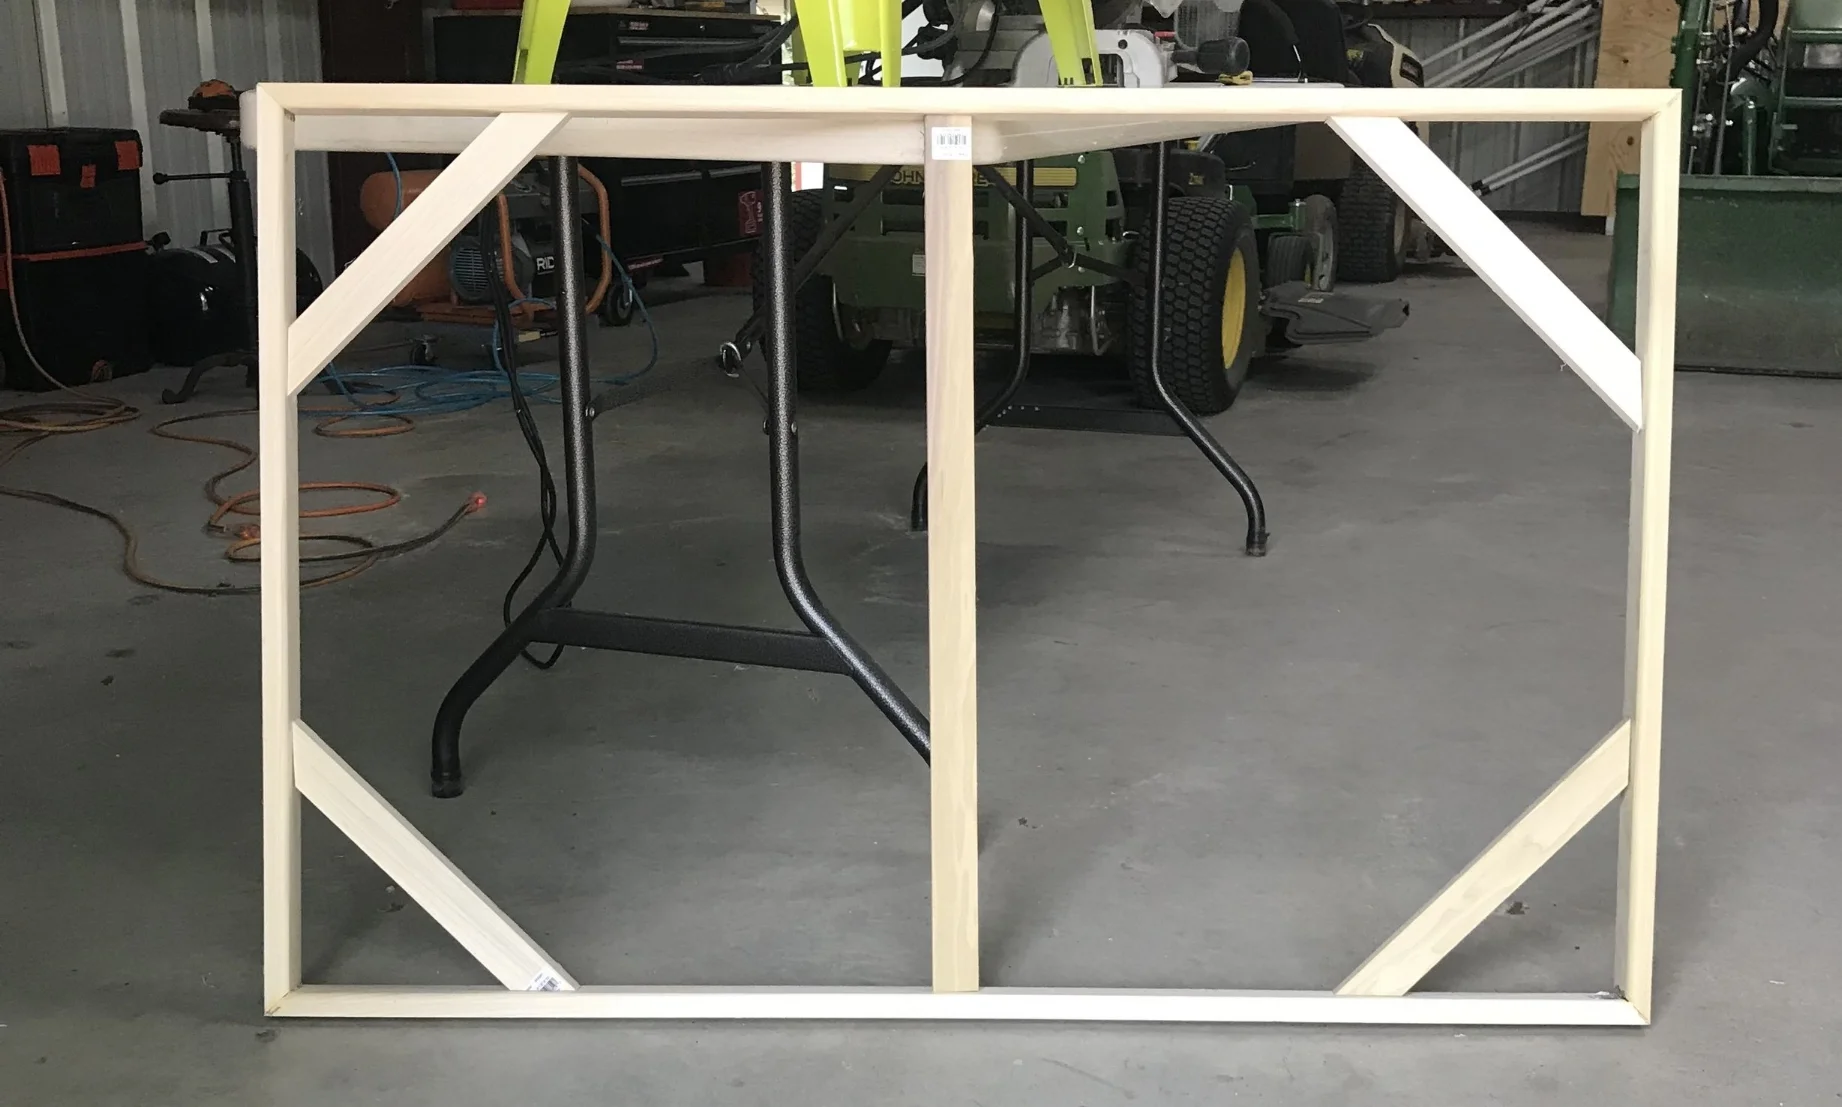
Measure 4 exterior pieces, 1 middle support bar, and 4 corner pieces.
SECOND: Measure the size of the exterior frame and, using a miter saw, cut each end at a 45 degree angle. I cut the wood standing up, so that the thickest measurement of the wood will be the exterior edge of the frame.

THIRD: Measure the interior support bar. It will be the length of the interior measurement of the shortest side of the painting. Cut the support bar at a 90 degree angle.
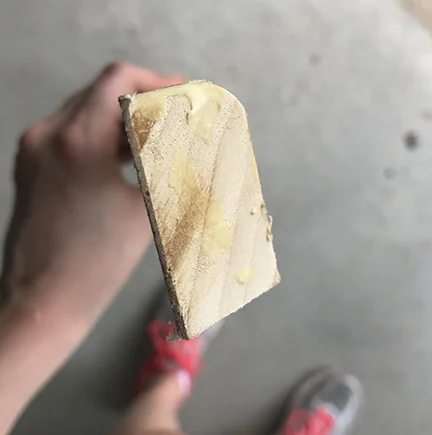
FOURTH: Cut corner pieces along the flat side, not standing upright, at a 45 degree angle.

The corner pieces (top) are cut along laying flat, so that they don't have as much height as the outer frame.
FIFTH: BEFORE GLUING, router each piece of the outside frame so that the outside edge is sharp, then curves towards the middle of the frame. The rounded edge helps for the interior edge of the frame to not be visible once the canvas is stretched.
SIXTH: Once routered, strap the outside pieces together, making sure corners fit.

SEVENTH: Apply glue to the corners of outside pieces, and tighten strap.
EIGHTH: Fit the support bars & corner pieces into the middle of the canvas. Make sure that the bottoms of the support bars don’t touch the ground, and are inside the frame. They will stick out from the back of the canvas if not, and will scratch the wall that they hang on! I usually don’t glue these, I just use the nail gun once the glue on the frame is dry (see next step).
NINTH: Once glue is dry, secure corners of the frame, support bars, and corner pieces with nail gun.

TENTH: Sand any uneven corners or edges.
ELEVENTH: Stretch canvas tightly with a staple gun, beginning in the middle of each side, and alternating sides every 5-10 staples. This tool saves my hands and gets the best grip on the canvas! DO NOT STAPLE ALL THE WAY TO THE CORNER. I did a fun time lapse video of the stretching process on my Instagram Story!
TWELFTH: Finish stretching by securing the corners of your canvas. Staple all the way up to the corner on one edge of the corner, leaving the other side with some un-stapled space. Pull the fabric on the fully stapled side towards the center of the canvas. Staple to secure.


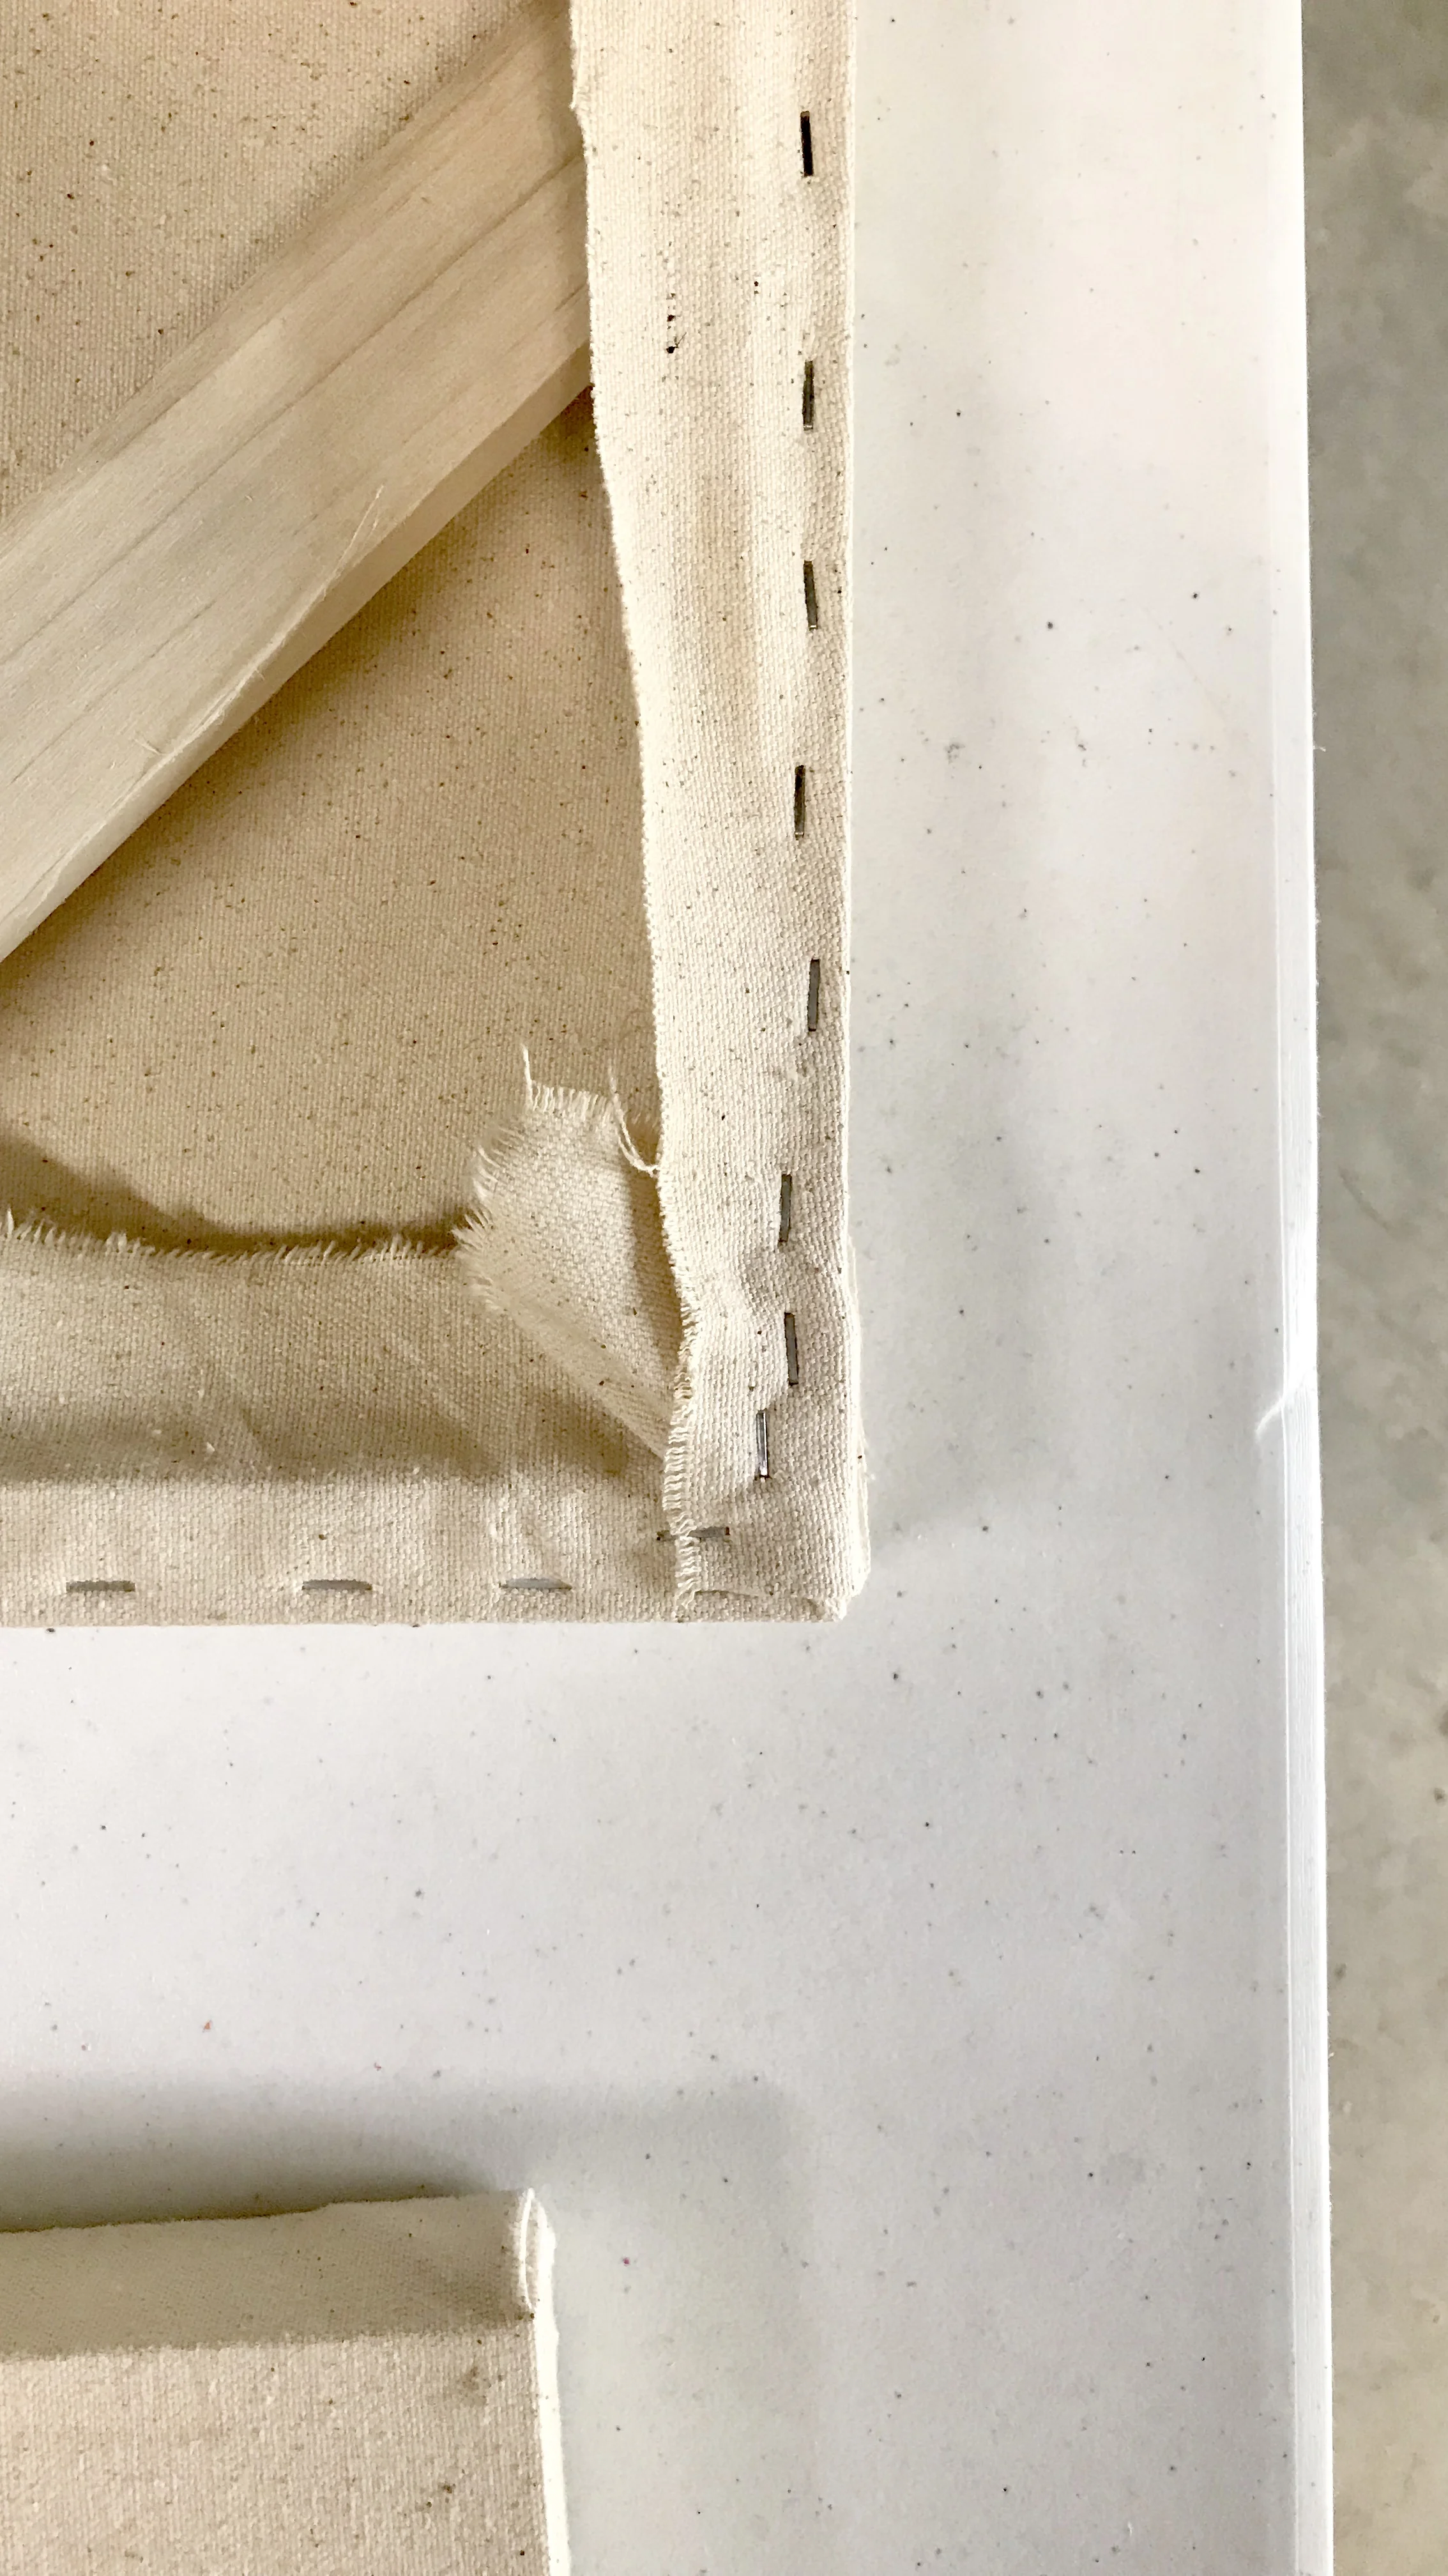
THIRTEENTH: Fold the excess canvas under the flap on the unstapled edge, and fold over so the edge is flush with the stapled edge. Staple to secure.
FOURTEENTH: Prime canvas with three layers of gesso, sanding the surface in between each layer.
Voila! There you have it. Your very own, hand-built, custom-sized canvas. If you need a custom-sized painting for that super specific spot on your wall, I'd love to build and paint one for you!